

How To Create Material In Revit
Introduction
Materials are often a neglected part of our Revit models, as it is sometimes hard to know how much work and attention we must put into our material library. This post aims to bring some clarity to this issue, by reviewing the different parts of the Material Browser, the properties that make up a Revit material, and the different possible uses beyond defining the appearance of elements in renders or other visualizations
Anatomy of a Revit material
We can access and edit the properties of the materials in our model from the Material Browser (Manage tab > Settings > Materials). For each of the materials, we can identify several tabs with properties.
Identity
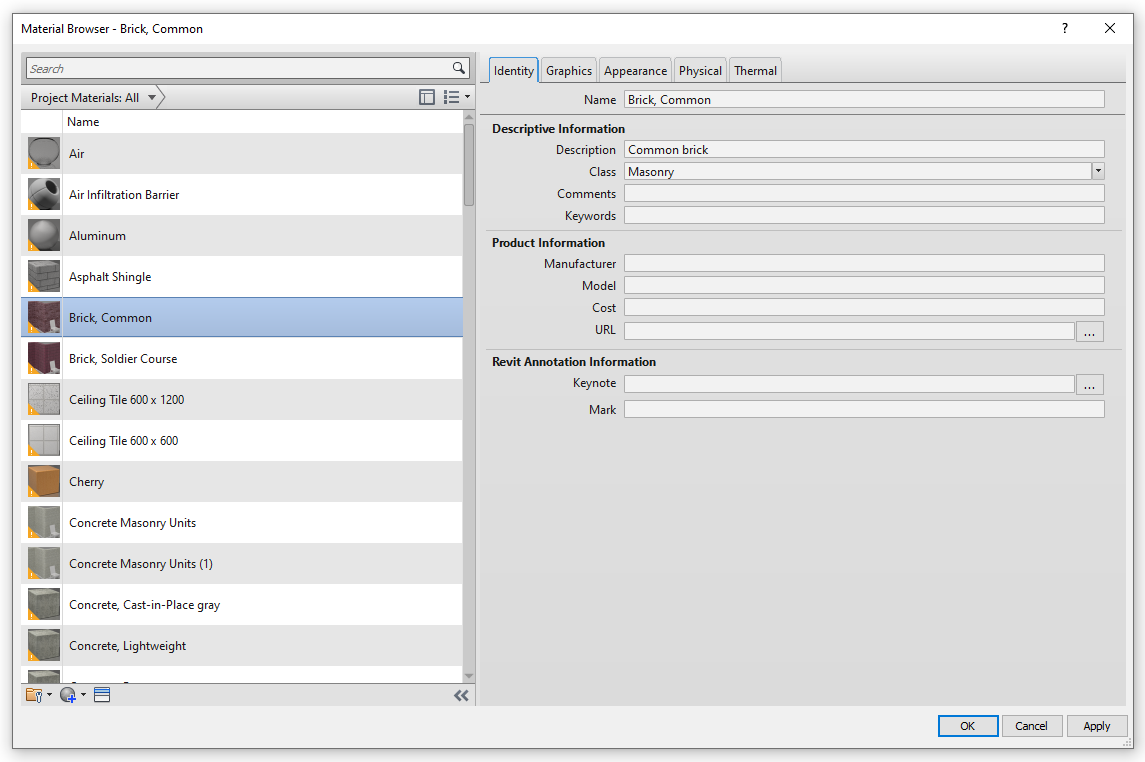
Here we can set the name of the material, as well as other attributes and characteristics. The important remark here is that these do not affect the graphics or visualization of the material, these are only information attributes. Thus, they can be useful for organizing, classifying or keeping control of the materials in our model. As seen in the image below, these properties can appear in material takeoff schedules:

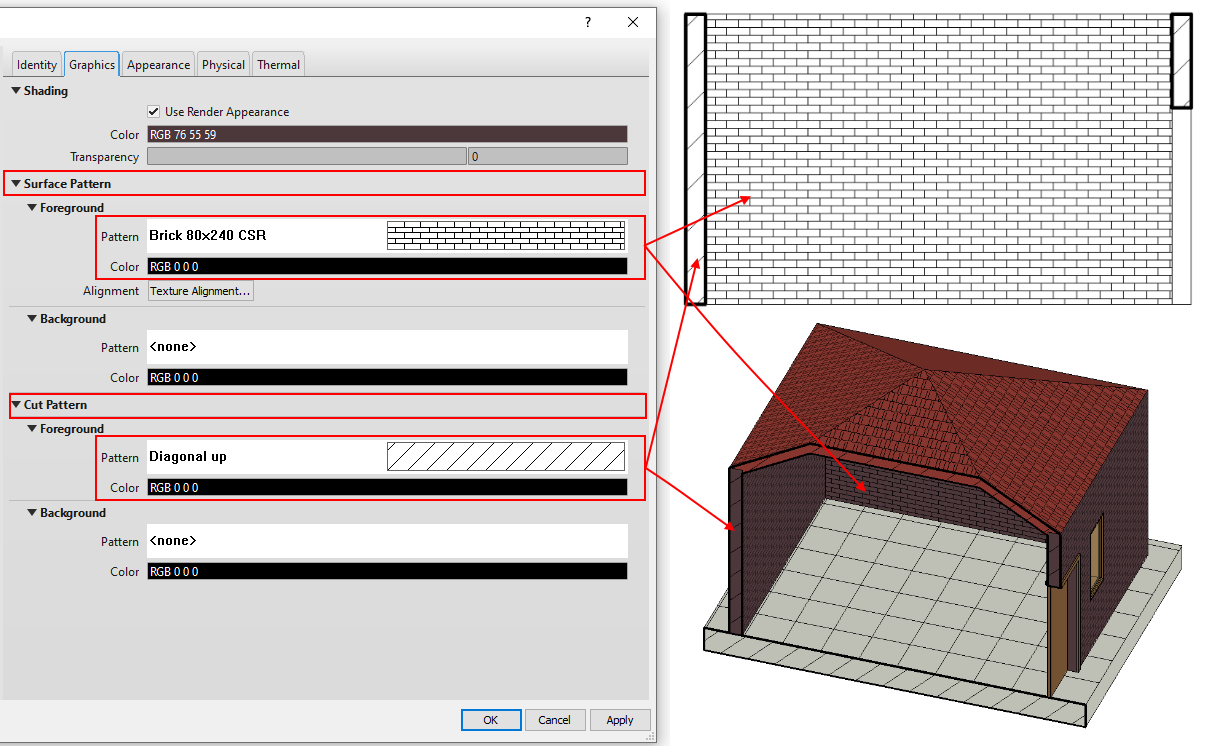
Graphics
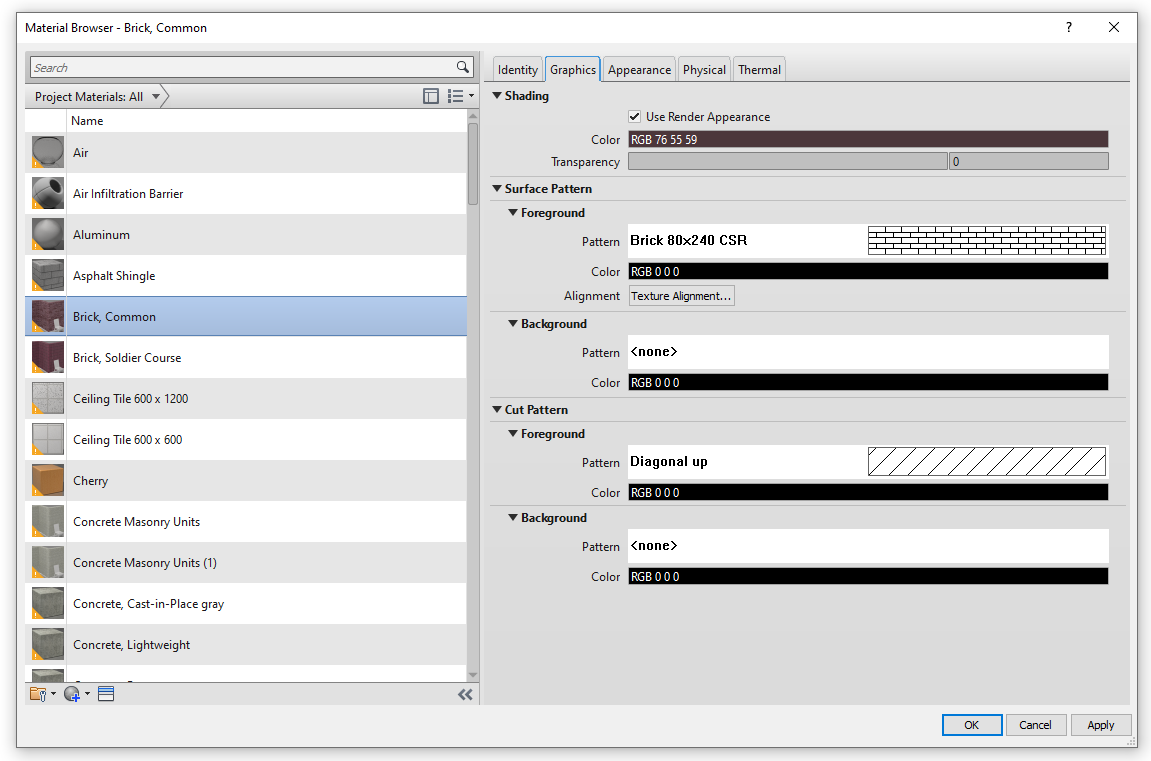
These properties control how the material looks in non-rendered views. These include the "Shaded" and "Consistent Colors" display styles, as well as the "Hidden Line" style typically used in drawings, both in 2D (orthographic) or 3D views:
Appearance
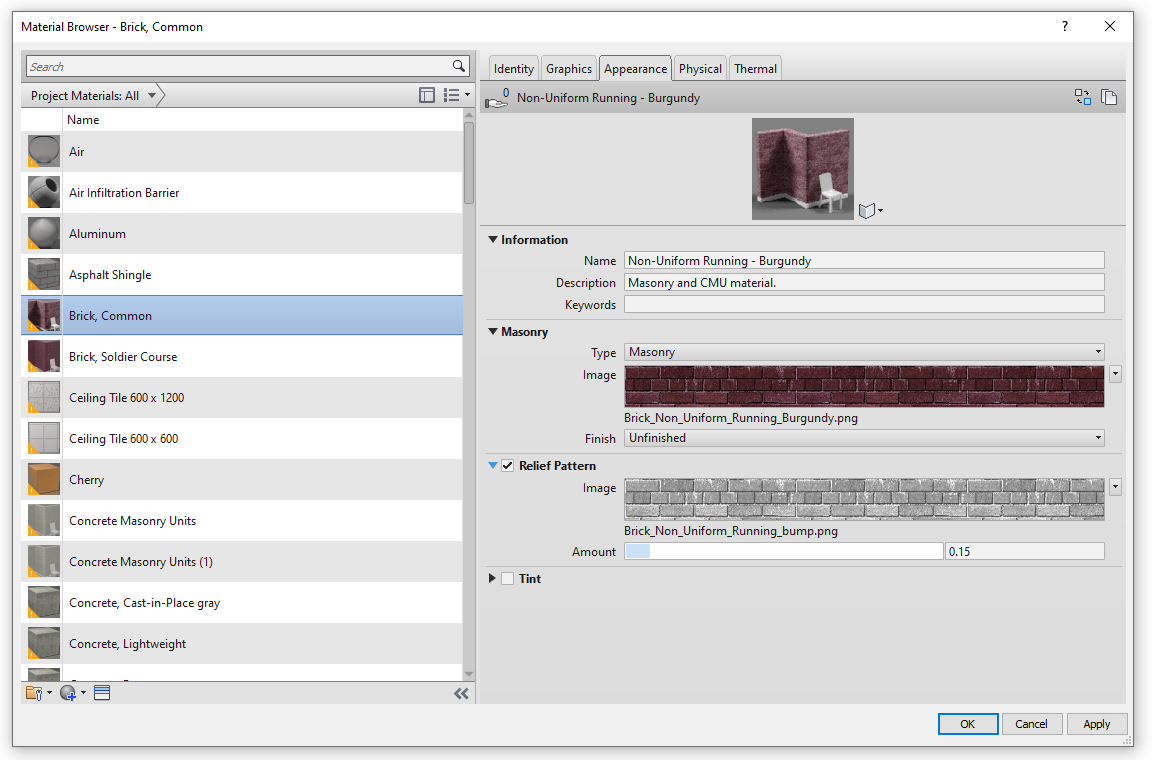
These properties control how the material looks in renders, as well as in views with the "Realistic" or "Ray Trace" display styles:

This tab introduces a new idea, that of the "material assets". Assets are groups of properties that control certain characteristics or behaviors of an object. In this case we are talking about Appearance Assets, which control how materials are displayed in rendered images and the display styles already mentioned. The Appearance Asset used for the selected material is shown at the top of the Appearance tab, and there are two buttons next to it, which allow us to (1)Replace or (2)Duplicate the asset:

In the first case, the Asset Browser shows up, allowing us to replace the asset with another one from the appearance libraries available:
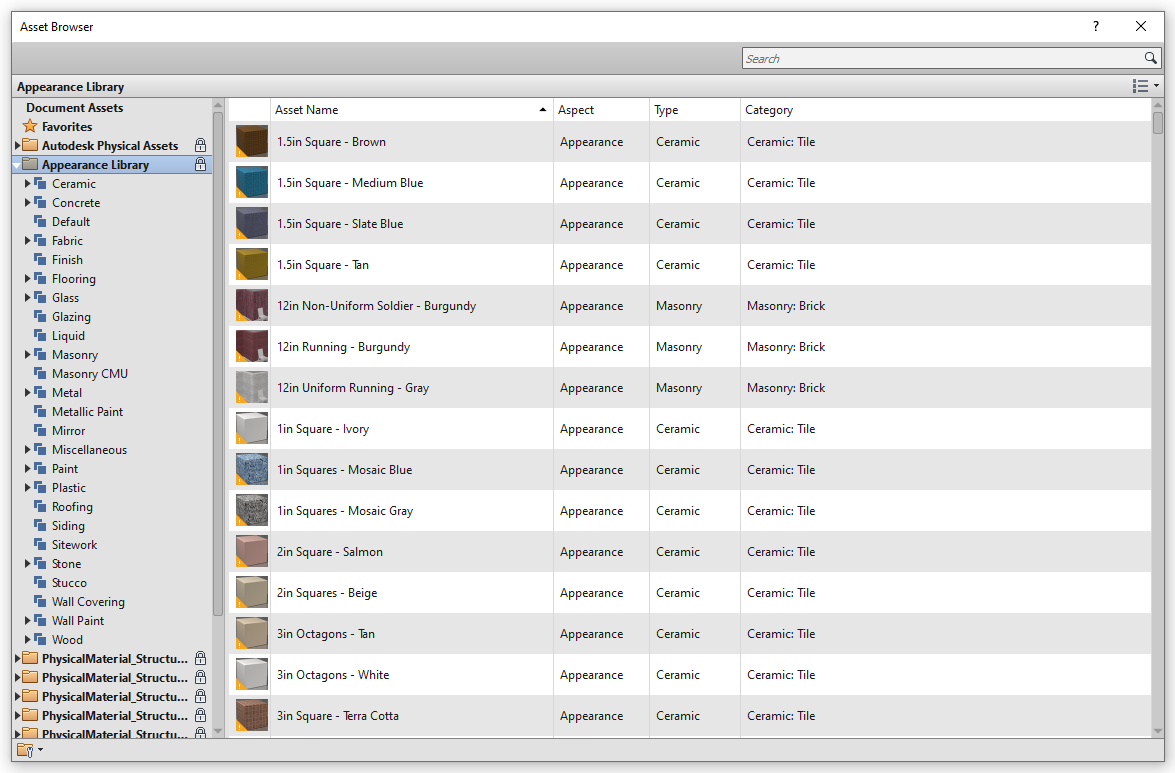
Here, we can browse through the different categories shown in the left pane, or use the search box to filter the assets with key words. There are only 17 main "types" of Appearance Assets, namely:
- Ceramic
- Concrete
- Generic
- Glazing
- Layered
- Masonry
- Metal
- Metallic Paint
- Mirror
- Opaque
- Plastic
- Solid Glass
- Stone
- Transparent
- Wall Paint
- Water
- Wood
Each of these have a distinct set of properties that can be adjusted. As an example, the image below shows the properties available for three different types of Appearance Assets:
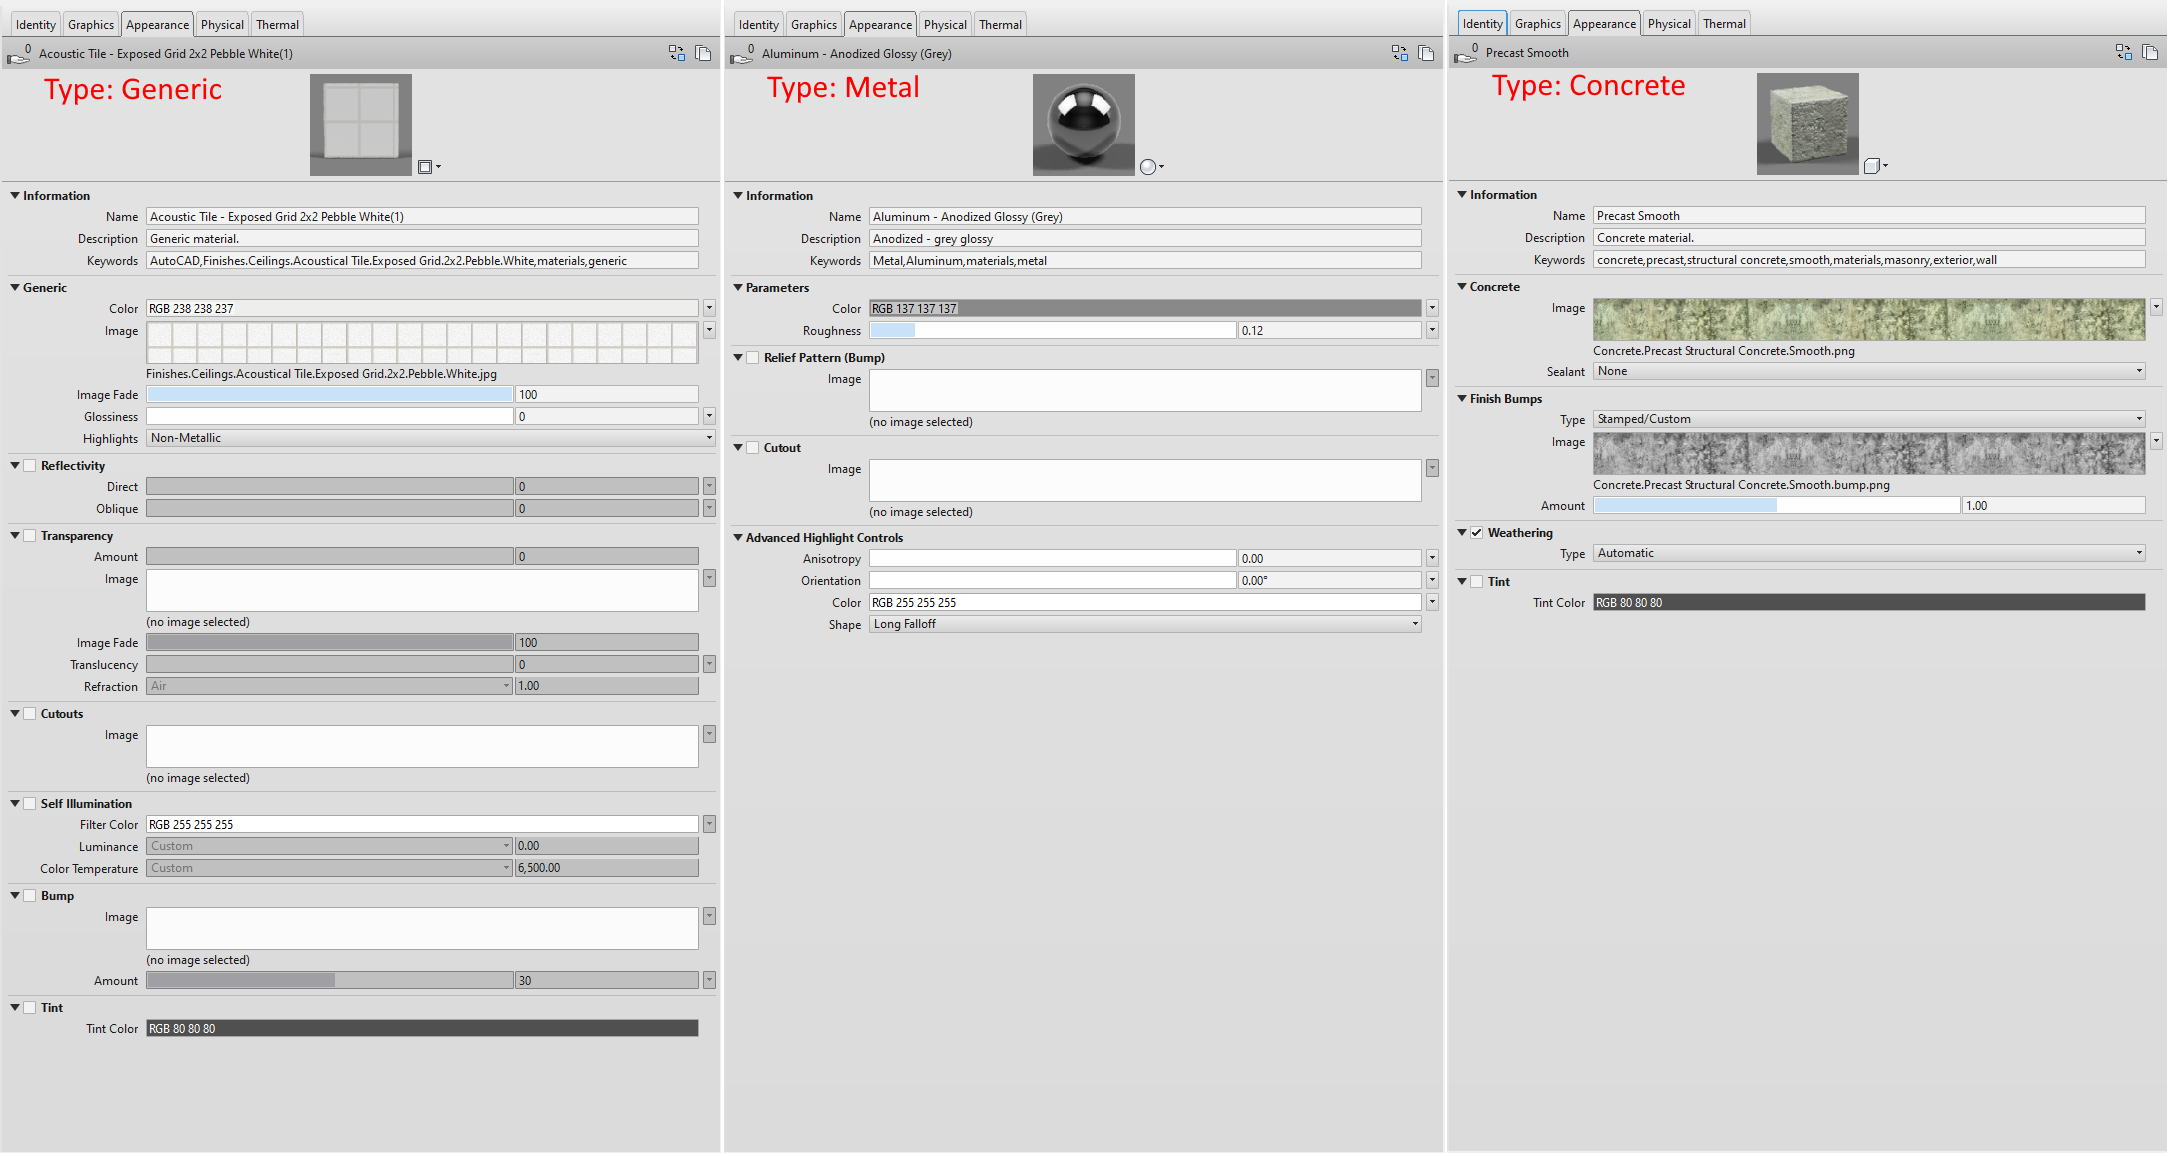
As shown above, some types of assets (such as "Concrete") are based on image textures, while others (such as "Metal") rely mostly on numeric values of properties such as highlights, relief pattern, reflectivity, transparency,…
Physical and Thermal
There are two other material assets that can be assigned to materials. These are not necessary, so not all materials might have it. They are:
- Physical Assets: contain properties used for structural analysis.
- Thermal Assets: contain properties used for energy analysis.
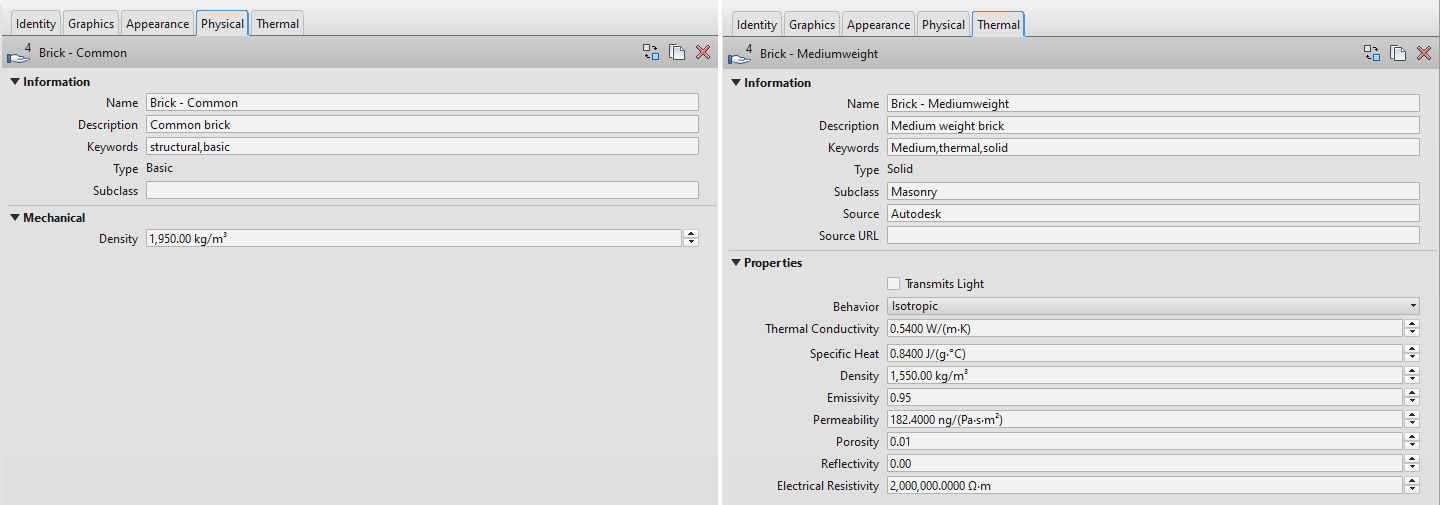
The image below shows an example of each of these assets:
Use of materials in Revit
The way materials are used may vary greatly from project to project, and therefore the level of information required might vary too. Thus, we must be aware of the intended use of materials when working on a model. Carefully filling in all the properties of materials might be a waste of time if these will never be used; on the other hand, not paying attention to material properties that will be needed down the road, might pose a bigger problem when we have to go through all the materials and revise and complete the missing fields.
Which material properties will be used and the required level of information will be determined by the intended BIM Uses of the model, which should be clearly stated in the BEP of the project.
Related to the different parts explained before, we can look at the possible uses of materials in four different levels.
Information level
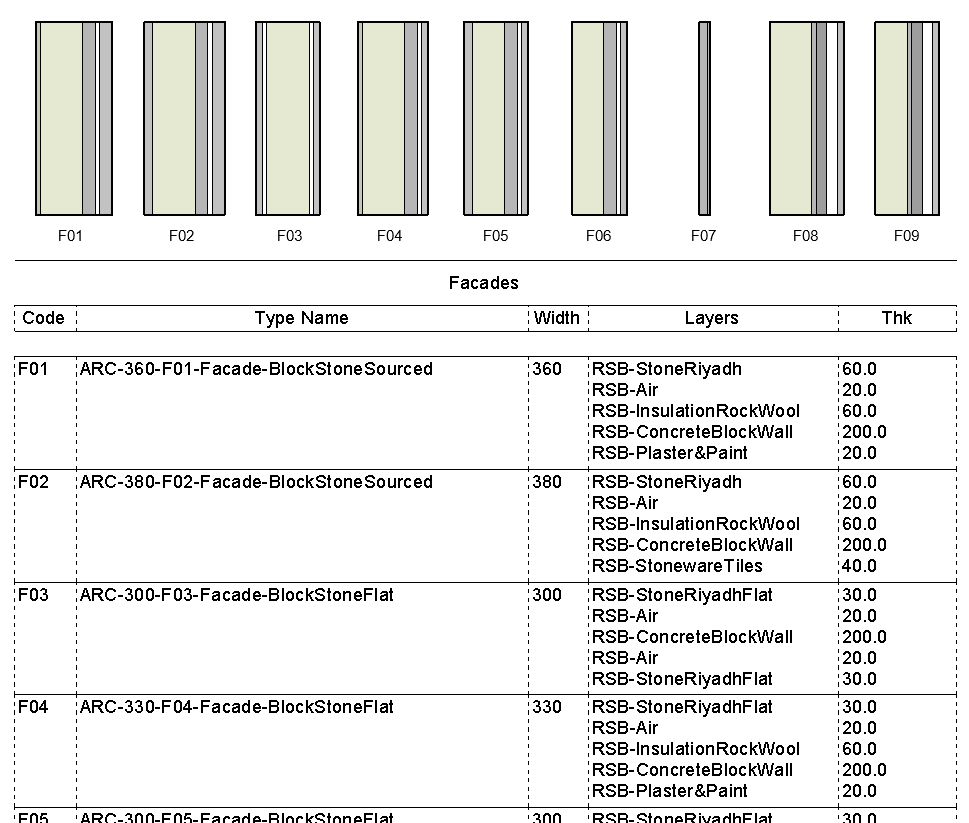
The properties related to this level reside in the "Identity" tab. In most cases, the material's name is an important property, which will be used to identify the composition of model elements, such as the different layers that make up a wall or a slab, even when this information might also be coded into the family or type's name. In some cases, a specific naming convention might be defined for the project, as a clear and descriptive name can be very helpful. As an example, the table below, included in a wall details plan, offers a clear understanding of the different typologies, using the wall layers' material's name:
Graphics level
This level relates to the way materials will be represented in drawings or other views. Thus, this is a key element in almost every project. As seen before, we can control these aspects from the "Graphics" tab.
Visualization level
This level relates mostly to the properties of the Appearance Assets associated with materials in the "Appearance" tab. This is a commonly neglected aspect, as it is more complex than the others, and it is generally of little value in many projects. In projects where the model will actually be used for visualization purposes, there are generally two cases:
- The model is exported to a different software, better suited to develop renderings or interactive virtual experiences, such as Unreal Engine, Unity 3D, 3ds Max,… In these cases, the appearance information is rarely useful, as these specialized programs have different material systems and use their own material libraries. Thus, the necessary properties required for a successful exchange of information reside in the information level rather than in the visualization level. If there is an external company involved in the process, we should agree on the minimum information required in materials, coding and naming convention, to facilitate their work and avoid misunderstandings.
- The model is used to obtain quick, work-in-progress images or walkthroughs for coordination or review purposes. Although Revit's visualization capabilities are quite limited, the built-in render engine or third-party plugins such as Enscape or Twinmotion allow us to very easily obtain visualizations which are good enough for coordination meetings, design review, follow-up meeting with clients,… It is in these types of cases in which paying attention to the appearance of materials can make a significant impact, although we should be aware of the purpose and quality level required, and achieve a balance between the amount of work and effort required and the expected value gain.
Analysis level
This level relates to the properties of materials required for analysis such as structural calculations or energy performance simulations. If the project does not contemplate the use of the Revit model for any of these purposes, we can most likely disregard the use of Physical Assets and Thermal Assets.
Conclusions
- Revit materials have properties of their own (of information and graphic representation) and others "inherited" from the assets (appearance, physical or thermal assets) assigned to them.
- This distinction is important, as the former are unique to each material, while any asset can be assigned to several materials.
- The required properties and level of information should be determined by the expected uses.
- This aspect should be taken into account from the very beginning, as an "information excess" implies a waste of time and effort, and an "information deficit" may compromise the usefulness of the model or, at least, entail extra work towards the end.
Author:Andrés Antolín
How To Create Material In Revit
Source: https://www.modelical.com/en/materials-in-revit/
Posted by: levinenes1943.blogspot.com
0 Response to "How To Create Material In Revit"
Post a Comment